

Photoshop Tutorials
- Grunge Blog Design New!
- Creating a Header
- Designing a Layout
- Slicing a Layout
- Creating a Website
- Simple Logo Design Ideas
- Web Banner with logo
- Create a Vintage Collage New!
- Colorful Paint Background
- Heart Background
- Backgrounds using Brushes
- Retouch an Image
- Photoshop Tips
- Shape your Text
Effects
- 3D Text Effect New!
- Awesome Special EffectsNew!
- Cool Photoshop Effects
- Great Looking Textures
- 3D Ball
- Bubbles
- Rainbow
- Magazine Image Effect
- Shiny Starburst Effect
- Halo Effect
- Crystal Ball Effect
- Reflection with Ripple
- Manipulating Expressions
- Pop Art Effect
- Superimpose Image
- Smarties
- Glass Effects
- Smoke Effect
- Icy Image
- Torn Paper Edge effect
- Brick Wall Texture
- Wood Texture
- Simple Photo Effects
- Twirl
- Glowing Twirl
- Rain Effect
- Embossed Image
Free Photoshop Resources
Other Photoshop Resources
Awesome Special Effects in Photoshop
Learn how to add some awesome lighting effects to transform images!
In this tutorial, we will learn how to create an awesome photo manipulation using light effects, fractals and some other cool techniques. Our photo manipulation theme is electrifying football. So to start, we need to have few things in our bag like player,fractal, and some space brushes. You guys can create your own fractals using Apophysis. Now we have everything we need, so let’s have a look at our final result:-
Step 1:-
Open your Photoshop and create a new file with 1039px width and 770px height.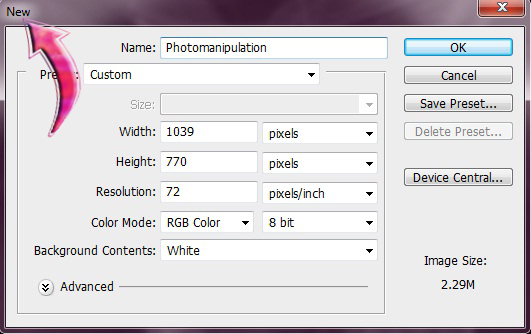
Step 2:-
Now select the “Paint Bucket Tool” and fill the background with # 000000.
Step 3:-
Open the Fractal image and paste it on our file.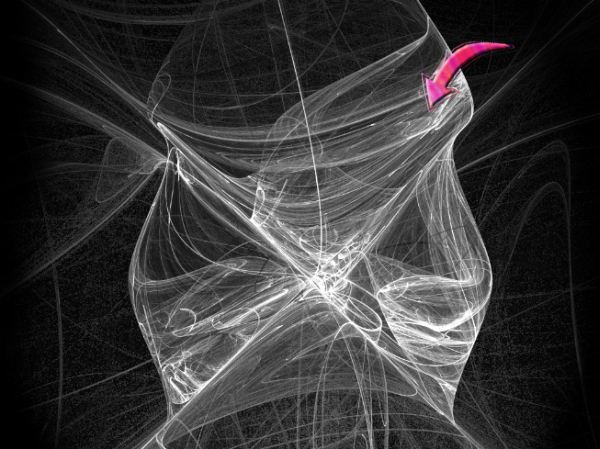
Step 4:-
Now we’ll have to add some nice and bright colors to our boring fractal. So let’s start with creating a new layer. For this, click on the Layer> New> Layer. Now select the “Soft round brush” with 50px size and foreground color # 293f4d. Use the brush randomly on our Fractal.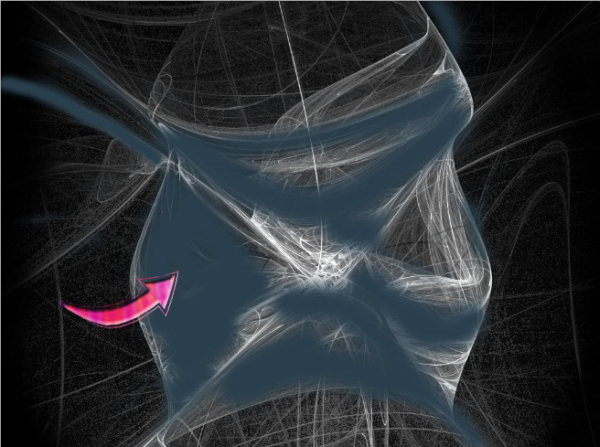
Step 5:-
Now select the color layer and click on Layer> Layer style> Blending Options and then change the blending mode to “Color”.
Step 6:-
Now select one of the brushes from the brush set mentioned above and change the foreground color to # ffffff. Then use it randomly on our background.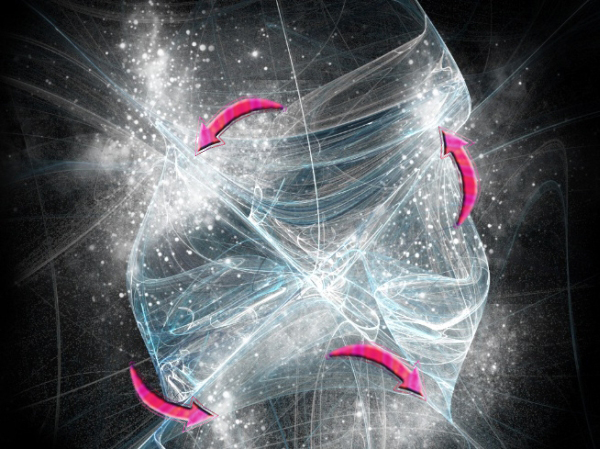
Step 7:-
Once again create a new layer, Layer> New> Layer. And then click on the “Paint bucket Tool” and fill the layer with # 662d91. Now select the “Soft round brush” and change the foreground color to # 861a45. And use it on the colored layer.
Step 8:-
Now select the layer and then click on Layer> Layer style> Blending Options, and change the blending mode to “Color”.
Step 9:-
Once again, create a new layer and select the “Soft round brush” with 50px size. Then change the foreground color to # fed5a8. And use it on the edges. And then change the blending mode to “Color”.
Step 10:-
Now it’s time to add some light effect, so for this select the “Rectangle Tool” and create a small rectangle. Fill it with # ffffff. Now click on Edit> Free Transform> Warp. And stretch it from the side to create a long strip.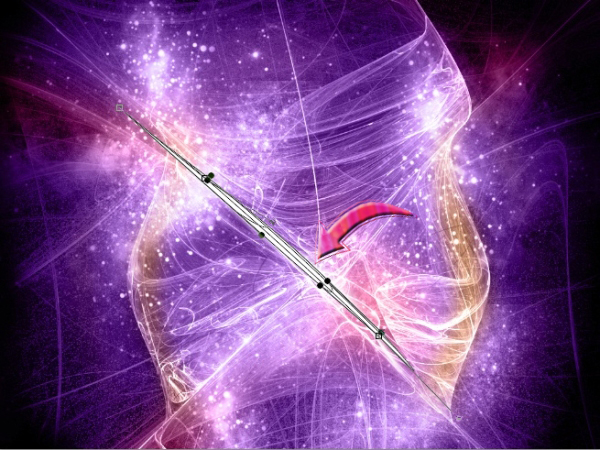
Step 11:-
Now click on Layer> Layer style> Outer glow with color # ffffff and blending mode should be “Linear dodge”.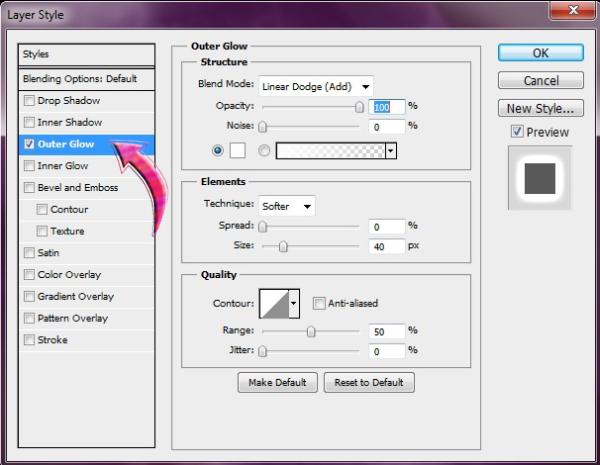
Step 12:-
Simply, repeat the same process and add another light strip on the right side.
Step 13:-
Open the player image and select the player using “Pen Tool”. Then paste it in the middle of our fractal.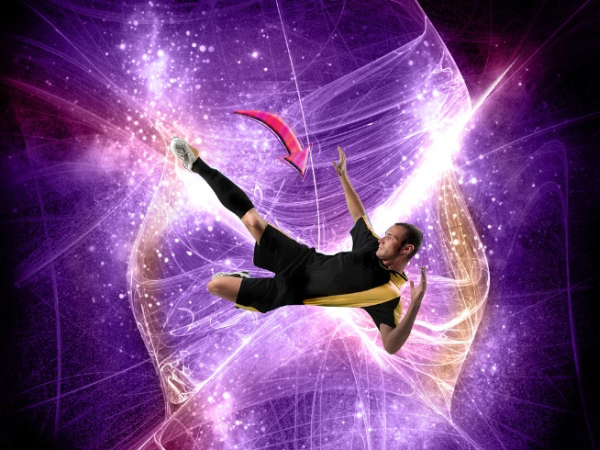
Step 14:-
Now add outer glow to our player. Click on Layer> Layer style> Outer Glow and add outer glow with # 870c66.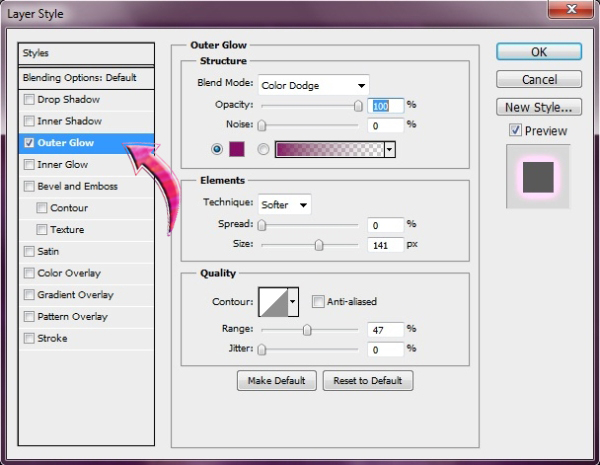
Step 15:-
Change the blending mode of player layer to “Hard light”.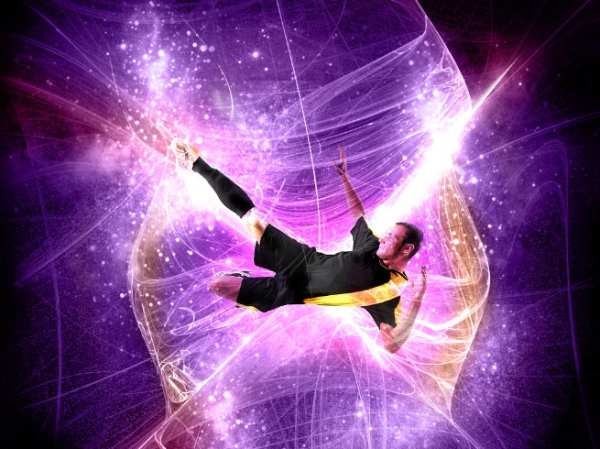
Step 16:-
Now select the “Ellipse Tool” and create a small circle on the foot of the layer. Fill it with # ffffff. Then click on Filter> Liquify and use “Twirl clockwise Tool” on the circle. After that, add some outer glow using # ffb400, blending mode “Linear Dodge” and 35px size.
Step 17:-
Now paste the football to the main file. And place it on the foot of the player where we have created the circle. Then change the blending mode to “Hard light”.
And we are done. Our electrifying Football design is ready. I hope you guys enjoyed the tutorial and learned something interesting. Do let us know what you think about this tutorial and what do you want to learn.
Please do Like, Tweet or Share this web design resource if you find it helpful!
Tidak ada komentar:
Posting Komentar