

Grunge Style Blog Design - Photoshop Tutorial
Learn how to create an awesome grunge style blog layout design in Photoshop. The source .psd file is also included for free download!
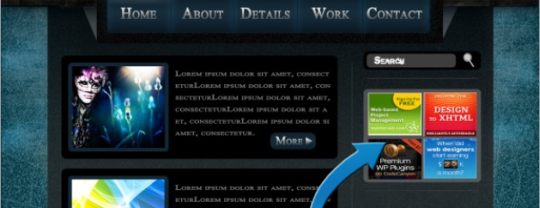
Hi guys, today we are here with a new and exciting tutorial. Let’s see what we have for you this time. We are going to create an awesome grunge style blog layout in Photoshop. As we all know, grunge is in and nowadays everybody wants to have a grunge style blog or site to stand out in the crowd. So before we start let’s see what we need to create our awesome grunge style Blog.We’ll need Grunge texture and grunge brushes. Now we have what we need to design our layout let’s have a look at the final result.
 |
Step 1:- Open your Photoshop and create a new file, for this click on File> New.
Name the file “Grunge Blog” and keep the Width to 1200px and Height 1400px.

Step 2:- Now we’ll use the black grunge texture from grunge texture set. Simply copy and paste it on our background.

Step 3:- Now you need to create a new layer for each step. Here’s how you can create a new layer. Click on, Layer> New> New Layer. Now fill the new layer with # 08acd1 using our “Paint Bucket Tool”.

Then reduce the opacity of our blue layer to 50%.

Step 4:- Now it’s time to use some grunge brushes. I’ll use them randomly on the sides with colors# 267895 and # ababab.

Step 5:- Now select the “Rounded Rectangle Tool” And create a small rectangle on the top.
And fill it with # 535353.

Step 6:- Now we’ll add some gradient to our rectangle for this click on Layer> Layer Style> Gradient Overlay. Then select the gradient with lots of color stops.

Then add pattern by clicking on Layer> Layer style> Pattern overlay, with 1% scale
and 23% opacity.

Now let’s add satin to it, for this, click on Layer> Layer Style> Satin. And add satin
with # a14400, with distance 14% and size 11%.

I think it needs a little shadow. So, click on Layer> Layer Style> Drop Shadow,
with color # 000000 and size 35px.

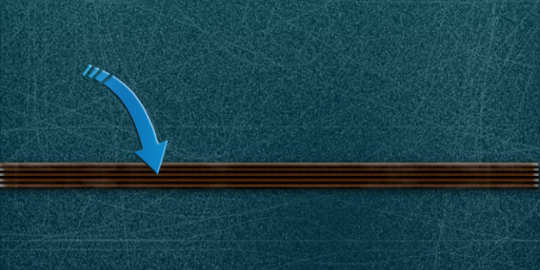
And to finish it off, we’ll need to add some grunge to it by creating a new layer
(Layer> New> Layer) and using the grunge brush with # c9caca randomly on our rectangle.
And now our grunge pillar is done. Now select all the layers we have used in creating our
pillar and combine them in a group. Name the group “Main strip”.

Step 7:- Now simply right click on our “Main Strip” and select “Duplicate Group”.
Now select the move tool and drag the second pillar to the bottom. After that click on
Edit> Transform, or you can do the same by pressing CMD + T if you are a MAC
user or Ctrl + T for PC user. And reduce the height of the second strip.
Step 8:- Now let’s create our header. For this select the “Rectangle Tool” and create a small rectangle at the top. Then fill it with # 000000.

Step 9:- Now we’ll add some noise to our rectangle, for this click on
“Fliter> Noise> Add Noise”. And keep the noise amount 9.51%.

Step 10:- Once again, select the “Rounded Rectangle Tool” and create a small
rectangle and fill it with # 3776e5.

Now we’ll need to add the “Lens Flare” on the left side of our rectangle.
Simply click on Filter> Render> Lens Flare. And keep the brightness to 160%.

Now reduce the opacity of the layer to 20%.

Step 11:- Add the logo for that select “Text Tool” and add the text.
You can name the blog whatever you like. I’ve named it “grunge blog”.

Step 12:- Now select the “Rectangle Tool” and create another rectangle below
our logo and fill it with # 172b39. Then we’ll add gradient to our rectangle for this
click on Layer> Layer style> Gradient Overlay.

Step 13:- Time to add buttons so select the “Text Tool” and add the pages,
with color #ffffff.

Now we’ll add gradient to our text as well. So, click on
Layer> Layer Style> Gradient Overlay. And add the gradient.

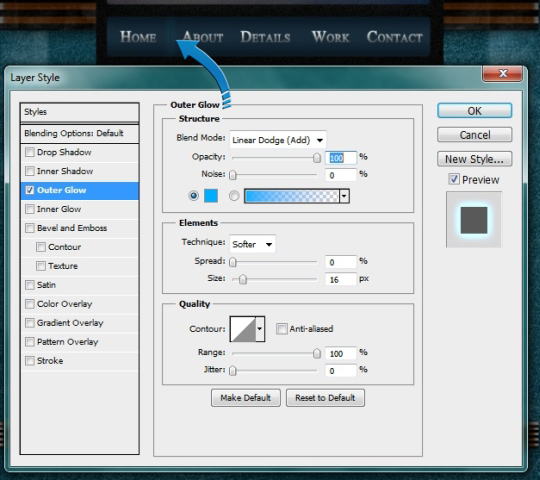
Step 14:- We’ll separate each button by creating nice small lines using our “Line Tool
between our buttons. So select the “Line Tool” and creating a small line with
1px weight and color#141414. After that, add some outer glow to our line
by clicking on Layer> Layer Style> Outer Glow. And make sure outer
glow color is # 00aeff.
Step 15:- Now simply duplicate the line layer by right clicking on the layer and
selecting “Duplicate Layer”.

Step 16:- Now to finish our header, we’ll create some folds. For this select the
“pen tool” And create a simple triangle. Then right click on it and click on
“Make selection”. Once our triangle is selected fill it with # 232f39. Now place
the layer under our header rectangle. Then duplicate the fold layer
(Right click on the layer and select “Duplicate Layer”) to create more folds.
And now our header is done.

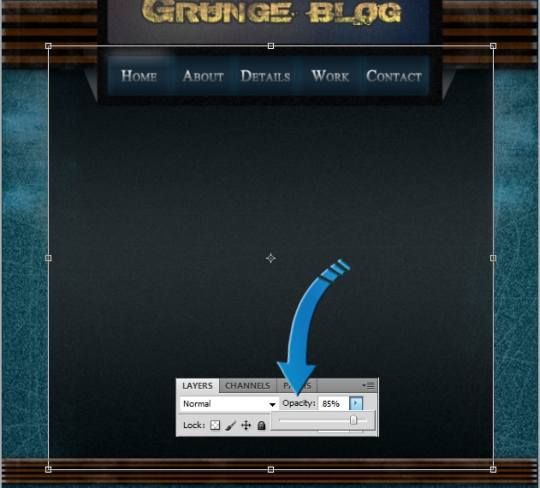
Step 17:- Once again, select the “Rectangle Tool” and create a big box in the middle.
Fill it with # 1d1d1e. Then reduce the opacity of our main box to 85%.
Step 18:- Now with “Rounded Rectangle Tool” I’ll create 3 small rectangles for
our posts and fill it with # 000000.

Step 19:- Now let’s add text using “Text Tool” and for images create a small
box using “Rectangle Tool” and fill it with # 132633. Then place the image in the center.

Now click on “Rounded Rectangle Tool” and create a small rectangle button.
And fill it with # 142733. Then create a small arrow using “Pen Tool” and add
text using “Text Tool” with color # c3c3c3.
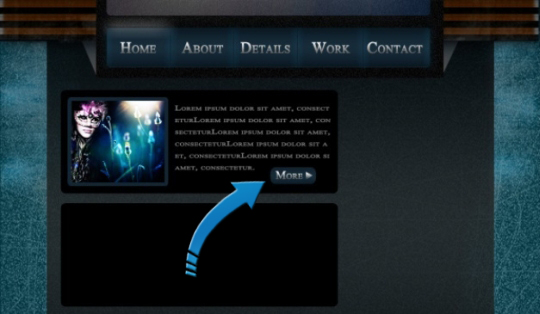
Step 20:- Simply repeat the same process to create three posts.

Step 21:- Now select the “Line Tool” and with 1 px weight and # 7f8080 color.
And create three small horizontal lines and one vertical line.

Step 22:- Let’s create our search box. For this click on “Rounded rectangle tool”
and create a rectangle. Fill it with #000000. Now create another rectangle and fill it
with # 3e3d3d. After thatplace it on the left side. Then place the search icon on the
right side of our main rectangle. Now add text using “Text Tool” and type “Search”.
And now our search box is done.

Step 23:- One again we’ll select the “Rounded Rectangle Tool” and create a small rectangle.
Fill it with # 555657. Now our ad space is done. So place your ads in it.
Step 24:- Now we’ll create a category section for this. Select the “Rectangle Tool”
and create a rectangle. Then fill it with # 616364. After that create a small rectangle on
the top and fill it with # 0e1112. Then select a grunge brush with foreground color #000000.
Use the brush on the edges of our rectangle. To give it a torn rough look. Now create a
small triangle same as we did above and fill them with # ffdc89. Now add text for heading
and options using our “Text Tool” with color # ffffff.

Step 25:- Now repeat the same process and create another section for popular posts.

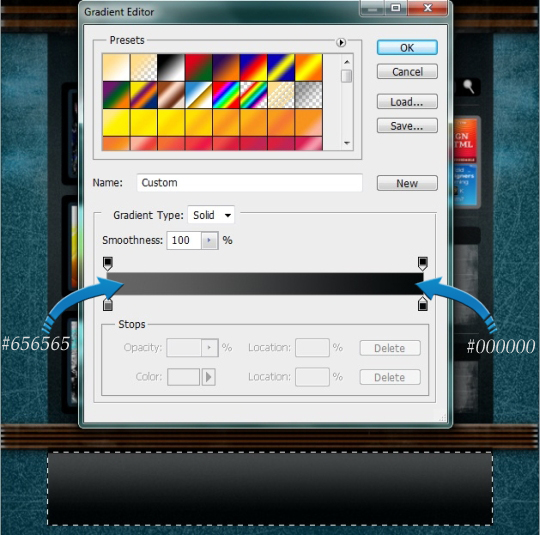
Step 26:- Let’s move on to our footer. For this click on the
“Rectangular Marquee Tool” and select a small area.
Then click on Layer> Layer style> Gradient Overlay.
And add a gradient to the selected area.
Step 27:- Now create a small rectangle with “Rounded Rectangle Tool”
and fill it with # 000000. Then we’ll add some Inner glow by clicking on
Layer> Layer Style> Inner Glow, keeping the outer glow color # ffffff and blend mode “Dissolve”.

Then add text using “Text Tool” with color # ffffff. Now create some bullets using
“Hard round brush” with # d88504.

Step 28:- Now repeat the same process to create more sections.

Step 29:- Now lastly we’ll add our copyright text at the bottom, for this click on “Text Tool” with # 848483.

And now we are done. Our Grungy Blog layout is complete.
Hope you guys enjoy the tutorial and learn something new.
Do try this and share your results with us. We always look forward to your feedback.
Do let us know what you think about this layout and what you want to learn in the future.
 capppcuuusssssssssssssssssssssssss sotoshop guys
Tidak ada komentar:
Posting Komentar